Sunday, April 22, 2012

Today's post isn't about sewing or quilting at all, but is to document the making of my first batch of soap in many years. The recipe is the most simple:

  • 1000 grams olive oil
  • 178   grams lye
  • 330   grams water
Here's what I did:

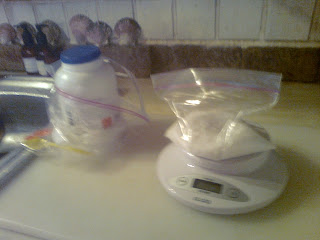
(1) I weighed out the lye. I kept it in a plastic bag so that there would be one less caustic thing to wash afterwards.


 (2) I measured my distilled water into a glass pyrex measuring cup.

 
(3) The oil was measured into the cooking pot.


(4) You see, below, my preparations for mixing the lye into the water (nb, it is always the lye into the water to avoid any splashing).


(5)  Here is the oil, heating up in the pan.

(6) Now, the oil is hot and the lye water has created its magic chemical reaction. As they both cool to about the same 100 degrees Fahrenheit, they are mixed together. Getting them to within 10 degrees of the same temperature can be trickier than it sounds, so letting the containers sit in either a cold or hot water bath might help.


(7) Using my magic wand, I beat the mixture until it is solid enough that a trace of soap is left on the top when I swirl.


(8) Molds are filled.


(9)  Molds tops are covered with Saran wrap and wrapped in a towel for 24 hours.
 

Thursday, April 19, 2012

Today's project was to make a small zipper bag with fabric tabs on the sides of the zipper so that the upper corners are square and neat.

I started with a zipper with an opening of 7 inches.

I cut 2 squares of fabric, each one 2" x 3".

These were sewn to the front side of the zipper about half an inch inside the metal zipper stops.


Finger press the tabs facing out.

I cut a 2 pieces of fabric for the sides of the bag. With the zipper open, I sewed along the top. Since my fabric was a napkin with a seamed top edge, I simply lined up the top of the fabric along the center of the zipper and sewed.  Then sewed on the other side.


The bag was folded inside out and stitched along all three open sides, making sure that the seam was within the metal zipper stops.

When done, I just opened it up.


Just for the record, here are some of the completed pillows:


Saturday, April 14, 2012

My first posting is about making pillows. Not everything you ever needed to know about making pillows, but how to make the back of a pillow with a clean, neat zipper. My photos aren't the best, but they will do for now.

Supplies:
  • Fabric a few inches larger than the pillow front
  • Plastic zipper a few inches longer than the piece of fabric
  • Sewing machine with zipper foot
  • Basic sewing supplies: pins, thread, scissors, etc
Cut your fabric into two pieces. One half should be about 3 or 4 inches wide and the other is what is left.


Layout and pin together as below:


Keeping the zipper fully open and the zip past the left side of the fabric, sew the zipper to the fabric--close to the cut edge.

With the under side of the fabric up, create a fold to just cover the teeth of the zipper and pin in place. Stitch close to the teeth. It will look like this:


Ignoring my poor sewing technique and lack of selecting an appropriate thread color, you have finished the first side of the pillow bottom and it will look like below:


Now, you will start on the larger piece of fabric. And the procedures are the same. Here is the top half pinned and ready for sewing:


And after sewing:


Now, all you have to do is place the pillow front and back together and stitch around the perimeter of the front---make sure that your zipper pull is toward the center and that the edge where the zipper opens is lined up in a closed position.

Here is the pillow all ready for the final sewing. Sorry, you'll have to wait a day or two to see it completed. I am worn out.